Wednesday, May 16, 2012

The Official Launch of my Etsy Shop!

Hey Guys! I'm so excited! I finally launched my shop on etsy! I've been making these hair clips for months, and I honestly love each one more than the last! I love making them! I've made over forty so far, and I plan to make some crowns, hats, and little girls' fairy wands in the near future too! Each one is totally unique and made by me... with a little sparkle for an extra bit of excitement in them. You can find my shop HERE and I'll hopefully be adding more in the next few days! I have forty of them to setup on there! I'm so excited about this shop! I hope you enjoy my work as much as I do, because I sure love making them!


Friday, April 13, 2012

More knitting!

 I had to have knee surgery a few weeks ago, and since then I obviously haven't been getting around too much. Knitting has become my best friend! I made this Diagonal lace scarf with Caron Simply Soft yarn. I used Helena Frank's Diagonal Lace Scarf pattern, found here on Ravelry.com. Ravelry is always an awesome site to go to for patterns! The scarf does have a tendency to roll up, though, so unless you can block it I wouldn't recommend the pattern.

 And now to my all time favorite scarf! I didn't plan on this working out so well, with the color changing and the pattern changing at almost the same points, but it did. I love it! This one I have to keep for myself, because it's my all-time favorite color combination. It's also one of my favorite patterns due to its simplicity. I used Deborah Norville's Serenity Chunky Weight yarn. I did a simple basketweave pattern that goes as follows:
Co 25 sts (or any multiple of 5)
Row 1: (K5, P5) to end of row
Row 2: (P5, K5) to end of row
Repeat for 5 rows
Row 6: (P5, K5) to end of row
Row 7: (K5 P5) to end of row
Continue alternating the stitches every 5 rows.
Basically, you want squares of stockinette and reverse stockinette stitches to alternate. It's very simple. And I love the results on this scarf!

Tuesday, March 20, 2012

Knitting Projects!

 Lately I've been busy with multiple knitting projects, which is why I haven't posted on here much. I absolutely fell in love with the pattern for this scarf, called Brooke's Column of Leaves. It's a little tricky at first, but once you get the hang of it you can fly through it. I actually made two scarves with this pattern, one in the navy blue shown and one in a lavender color. I used Caron Simply Soft yarn and it turned out to be the perfect size. This is such an awesome pattern! I'll probably end up making another scarf like this, because I just love the way it looks so much. :)
 Also, meet my friend, Mr. Cupcake. I knitted him with old yarn scraps from several other projects, and I love him! Such a cute little guy! I found the pattern on the blog Maiya knits. Mayhem ensues. I found stuffing him with cotton balls worked out just fine, no need to waste fiber fill. I just love that it's a knitted cupcake! :D

Sunday, February 19, 2012

Rosette Bracelet!


While wasting my time looking at all the wonders of Pinterest, I discovered a tutorial to make fabric rosette bracelets on So I Saw This Tutorial. I conveniently tore my ACL this last week, so I have plenty of time to actually make the things I pin in my "Things I Want to Make" board. This was top of the list! I happened to have a box of fabric pieces I found on clearance at Joann's, so it worked out perfectly! The tutorial was easy to follow, and I love my new bracelet! Here's my final result:


Sunday, February 12, 2012

Egg Ornament Tutorial!

In my last post, I showed you guys some pictures of egg ornaments I was working on. Well, the tutorial is finally here! To begin, you need:
-Egg shells, cleaned and dried
-Any kind of tacky glue (I used Elmer's school glue) or hot glue if you prefer
-Glitter
-A variety of small objects such as figurines, beads, stickers, pictures, miniature animals, buttons, toys, etc.
-Sequins
-Fake moss or cotton balls for a ground/sky effect
-Indoor paint
-Scissors


To begin, get some eggs (as many as you can eat!) and break them open, very carefully, with the tip of a knife. To do this, I held the knife gently at an angle to the egg and drilled the tip into the shell while applying pressure. once the tip goes through the shell, use it to break off pieces from the inside to create a hole big enough for the egg yolk to escape. Mine were approximately the size of the tip of my thumb. Carefully rinse out the eggs, and let them dry completely.

 Next, paint the outside of the eggs whatever color you'd like to have underneath your glitter. This color isn't super important, because the glitter does cover the majority of it, but it does show through a bit. This step is necessary because I've found that if you don't add a layer of paint, the egg shell is impossible to cut with scissors, like I did.

 
Let the eggs dry completely, overnight if necessary. To dry them, I used my Paint Pens to stand them up by sticking the cap inside the hole of the egg. Make sure you have paper underneath in case any paint drips! Once the outside is dry, Choose another background color to paint the inside (I used mainly blue and green) and allow that to dry as well.


Next, apply glue to the entire outer surface of the egg, making sure you cover all areas. I just squeezed some glue onto the egg and used the tip of the glue bottle to spread it around. Make sure not to use too much glue here, because it will make strange shapes from the drips when you allow it to dry. Apply glitter to the entire outer surface, and allow it to dry completely.


For this step, you definitely want some relatively sharp scissors! Cut through the shell of the egg, very carefully, and form an oval-shaped opening in the egg shell.
 The egg should look like this when this step is completed. The edges will be rough and uneven, and it's all right if you happen to accidentally break off a small piece of the shell when you're cutting. Just remember to be careful!
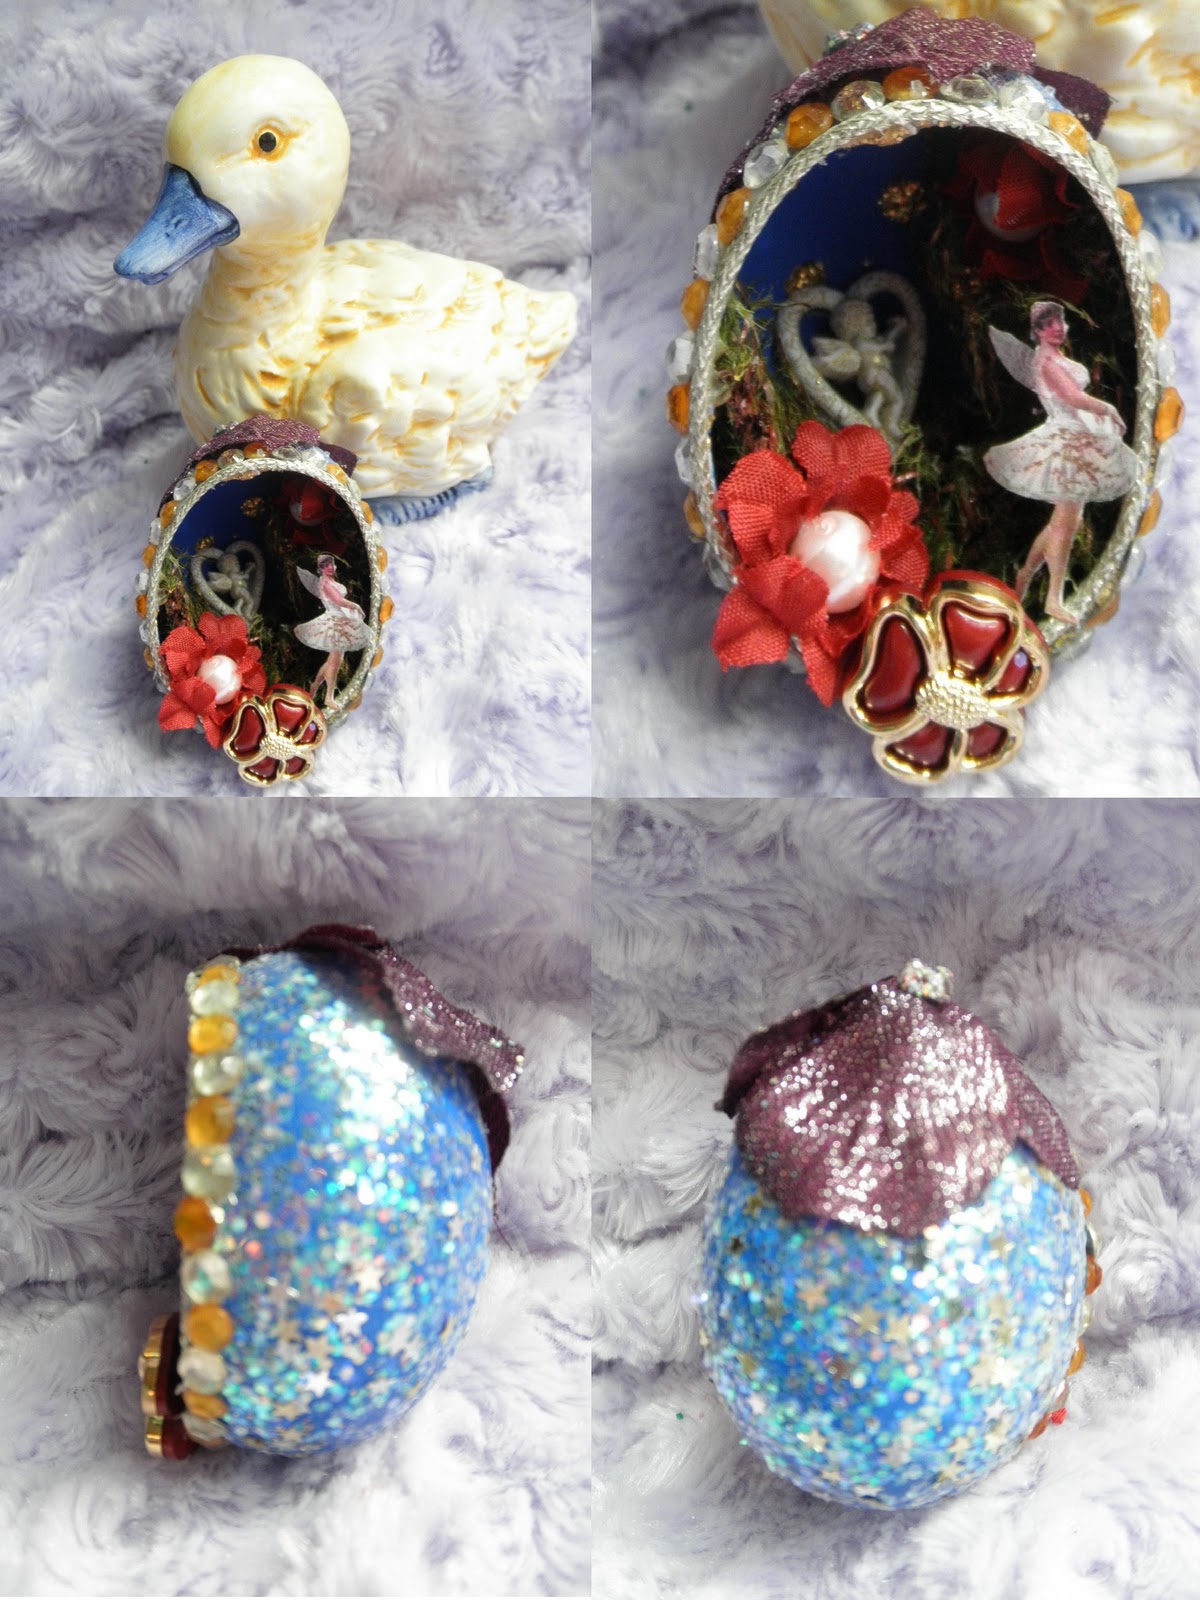
 Next, use sequins, rope, cord, stickers, etc. to cover the exposed edge of the shell. I love the way sequins look! I also used to metallic cording and hemp cording on the ones I made. Once this dries, you can begin adding fake moss, buttons, etc. to make your own little miniature scene. I also used lampwork glass beads that I bought here and threaded cord through them before gluing them to the tops of the eggs. I found this was the simplest way to hang them. Have fun and use your imagination!


Here are some of the newest finished eggs:


I'd love to see pictures of anything anyone makes using this tutorial! Feel free to share!


Monday, January 23, 2012

Easter Egg Decorations!

 Due to the fact that I have a broken thumb, not much crafting has been done lately. In fact, not much at all has been done. You wouldn't believe how many things you need a thumb to do! However, I got inspired for Easter and made some new vintage-inspired Easter egg decorations, out of real egg shells! So far, all I have done are these three. I'll have to eat some more eggs for more shells! I didn't take pictures for a tutorial this round, so I'll try and get a tutorial up as soon as possible. Here are my eggs, with the cutest little duck ever, that I found at a secondhand store recently. I love him!


Monday, January 9, 2012

Hot Chocolate Cake Ball Experiment!

Pinterest allowed me to discover an amazing DIY tutorial on cake balls the other day. I've seen them everywhere lately, and even saw one of those little cake ball makers that actually can bake the ball the correct shape. The tutorial I found didn't require a special machine, just a little willingness to break up a whole cake and squish some frosting in your hands! I loved the whole thing, and the end results were so fun, even though our attempt wasn't quite like the picture. I found the tutorial on this site, and I actually found myself searching for more great ideas! Anyways, here's some pictures of the ones my wonderful mom helped me make today:

 My mom had some fun with chocolate syrup so I could take some pictures of them!


 And, here's me with all the finished cake balls! I love the colors! To make the balls different colors, we simply used white chocolate chips we melted and used some neon food coloring I found at the store. We used Raspberry, Neon Purple, and Neon Green for the actual candy coating and Neon Blue for the coconut on top of some of them. We also used toffee pieces, peppermint sprinkles, rainbow jimmies, chocolate chips, and walnuts on top! I even hid some marshmallows in the centers of a few, though I have no idea which ones! I love this idea, and I definitely recommend that tutorial! So easy to follow! I'd love to see more pictures anyone has of cake balls, and to see what everyone else uses to put on top of them!